Wednesday, August 31, 2011

A Royal Encounter


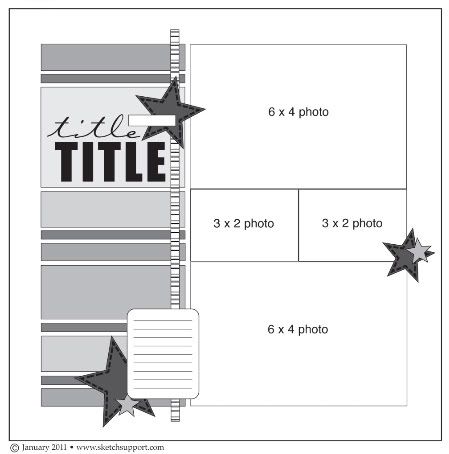
Twisted Sketch #117 was just what I needed to use some of my Heidi Swapp transparency pieces which I had been playing with aimlessly for a few days beforehand. I have turned and mirrored the sketch, but hopefully you can still see the likeness.

I loved the frame effect in the sketch, and my new Gottacraft kit starring Authentique Blissful papers had a sufficiently regal tone to them to enhance my 'royal' photos taken a long time ago at Hever Castle. I made the flower using some Basic Grey velvet ribbon and a brad from MME Lost & Found 2 collection, (as are the others used), printed out my journalling in an old style font aptly titled 'Blackadder'! and cut my 'long' (the twist in this week's sketch) title on the Cricut - thank you Debbie.

Three little fluted circles using my new 5/8" punch finished off the LO nicely. Thank you for visiting.

Sunday, August 28, 2011

Counterfeit Kit Challenge Blog Hop


Hello! Thank you for hopping by my blog on the Counterfeit Kit Challenge Blog Hop. I am super excited as this is my first blog hop participation and I've had so much fun with my sketch interpretation.

I have had these photos forever!! My DD is now 14 (the baby in the photo) - they are pre digital, I don't know where the negatives are, they are too busy and the colours are awful - you can tell I didn't scrapbook then, or this would have been staged!!

However, my scrapbooking genes were obviously there as I thought to take a series of photos which now mean the world to me because of the story they tell. Numbered 1-7, they show how my darling son came home to meet his new baby sister, stared, gave her a kiss then ran to get the toy Piglet we had been keeping in her crib until she came - all spontaneously! It brought tears to my eyes then, and still does now, it was so sweet. But these were the photos, and I've been wondering how to scrap them.

So thank you Sketch Support for your fabulous 7 photo sketch which finally gave me inspiration, and to CKCB who made me create a pink kit (not my first port of call, but perfect for baby girls) as I now have a double LO telling the story that I love.

You can find the sketch here.

I took two sheets of Bazzill Basics white cardstock as my base. I then cut my photos down to 4x4 as the 3x3 wouldn't fit in what I needed to keep from these photos. I played with all sorts of bits and pieces from my kit, before settling on a melange of pink papers, a mix of Imaginisce (had it forever - an Easter paper on the reverse), Crate Paper Neighbourhood, not sure what the others are, a length of spotted ribbon, some chipboard from Crate and Basic Grey and added thickers, with gel pen 'sewing' on them, and some tiny MM stickers for my title. The journalling was done with a Souffle pen onto a Crate Neighbourhood journalling postcard which just fitted the bill perfectly.

Please head off to Jennifer's blog now on your hop. Thanks for hopping over here.

Wednesday, August 24, 2011

A little present for a friend


One of my friend's eldest is just heading off to uni this September, and as a Mum, I can understand how she might be feeling - not that mine are ready to fly yet - but that mix of pride and fear and loss as your children grow up and need you in different ways.

So I made a little minibook that she can fill with photos and carry around to remind her in term time of her handsome boy, heading 'up north' for an exciting new chapter in his life. Thank you Petra for the personal tutorial on how to make these little books from one sheet of 12x12.

On another subject entirely, during a blog hop I came across this giveaway challenge by Kirsty Merran, of Gogo DT fame. It looks interesting, and it's always nice to receive a little something, so if you are interested then head over and see for yourself.

Tuesday, August 23, 2011

Turning it on its ear!!


The latest CKCB challenge is to take a sketch from the Sketch Support site and turn it before using it to inspire your creation. I took Card Sketch #4 and turned it 90 degrees to inspire the above LO.

Because it is a rectangular sketch, I reproduced it on 8.5 x 11 kraft card, then mounted it onto 12x12 patterned paper as I want it for that size album. I absolutely love this sketch and can definitely see me using it again, especially as it has huge potential for using up scraps, my favourite pastime!!

Lots of odd brads and buttons for decoration, and although it's not on the sketch, the washing line just appealed to me, I've had the stash for ages, waiting for an opportunity to use it, but as I haven't got round to baby photos until this pink counterfeit kit came along, they've been sitting patiently in my stash! The title 'Why Topsy' is also surplus to the sketch, as cards don't usually have a title, and my photo is where the greeting is meant to go.

There is a load of hidden journalling on the tag behind the kraft paper, telling the story of how my DD got her nickname Topsy - which was essentially me wrongly remembering the pictures of Topsy and Tim (UK children's books) which I loved and thought that DD's sticky up topknot was like Topsy - I was wrong, she had bunches, but by the time we found that out, the name had stuck, and has done for 14 years to the present day!!

Sorry about the photo, for some reason my software won't crop today!

Sunday, August 21, 2011

Catching up...


I've had a very happy weekend, in which I found some time to do some scrapping and cardmaking.
Top of this list was finishing off my next two layouts for Twisted Sketches - trying to get ahead :) More of these when they are revealed on the site, next Monday and a fortnight after that.

Next was an attempt to do another challenge from Shimelle's cybercrop last weekend. In the end I managed two - see above.

I actually got my sewing machine out for the first one, and I've had these photos out ready to scrap for ages now, so I'm pleased that I got around to scrapping them. I used up some scraps from my burgeoning pile, and took inspiration from two of her challenges (not sure if this counts) - 3 is a magic number, hence three dots, three people and three floral groupings. I also used one of the journalling blocks that Mary Anne provided for another challenge, which by serendipity came out the wrong colour as the red on my printer has given up! I'm trying to use up a pile of Bazzill which is not my usual colour palate and this pale green did the job nicely. I'm having a real green phase atm. I inked the heart (the final challenge - slight twist on I love... to We love...) to red to match the photo and liberally added gems to the flower groupings.

The second LO was completely out of my box, and was inspired by the red, aqua and white challenge. DD was painting the edges of a wooden minibook for a project and there was some paint left. What is it with Dabbers by the way? Not only does the top block really easily, but despite having the lid and cap on securely the paint has nearly dried up - it's not even that old!

Anyway I digress, I couldn't quite bear to waste this paint so I painted a big bold frame, then hand stitched around it for added boldness. I flicked lots of paint onto the cardstock, then added a whole panoply of stickers from my stash. Not at all my usual style, but I enjoyed playing and can see a paint exploration coming on.

Sorry about the abysmal photos.

Tuesday, August 16, 2011

Another folded flower


Anyone who knows my LOs knows that I make lots of flower embellishments using folded circles. On the explore class I made a flower (above) out of maps which I absolutely love but which is utterly 3D and would never work on a scrapbook page. So I started fiddling with flattened out versions of the petals - fail!

But....

By using smaller squares - inchies - and double sided paper - I came up with a square version which I like almost as much as the round one. (PS you can see a round one on the Slide stream of my LOs - called I love holding your hand).

Instructions:
1) Punch 8 squares of double sided paper or thin card (or single sided if you don't mind the points being white)

2) Fold the inchies diagonally in half, unfold, then fold in the side points to the folded line, at right angles to the line so you end up with a kite shape. The top point of the kite is one side of the paper and the rest is the reverse side.

3)Make 8 of these. Punch or cut a circle shape (about 2" across), or larger if you want it to show below your flower. Apply glue all over the middle two-thirds.

4) Arrange the kite shapes in a circle on the table to make sure the patterns are to your satisfaction, then put them onto the glued circle, move them around until you get a 'square' effect with the kite points.

5) I added two punched circles to the top, and pierced a hole through the entire flower and added a brad for decoration and security, but you could use gems or buttons as well.

Et voila! If you didn't want a contrast you could use the kites the other way up, or you could alternate the way you fold the squares, or use two complementing papers to make an infinite variety of flowers.

I think my flower looks kind of Christmassy and will probably end up on a festive LO somewhere.

Thanks for looking.

The half page challenge


I'm a fan of this - I've decided. This challenge from Shimelle's cybercrop weekend, really arrived at the right time. The above is my blank LO, as mentioned in a previous post from my attempt to do four at once! I had the photo, the ric rac and the kraft background! The rest came from my counterfeit kit stash (I've been waiting to use those rubons forever :) ) with the exception of the bakers twine which matched too well to resist) The patterned paper is a half sheet that I threw into the kit from my scrap bag, and my new tiny scalloped circle punches came in handy to make the flower embellishments with the remaining rubons.

I also used the card sketch #8 from the Sketch Support site for the CKCB sketch swap challenge.

Job done! I've scrapped one of my favourite family photos, used another bunch of stuff from my CKCB kit and I've discovered a new technique which I know I will use again.

Twisted Sketch #115


I was so excited to be started my term as a Twisted Sister and with the first sketch at the ready (see here) and a twist of 'Clear' my mind was running.

With no photos that jumped to mind for me to use 'clear' in the title, I started to think about transparencies, then I remembered I had a piece of acrylic 12x12 in my stash. I've always wanted to have a go at one of these, so feeling very brave I launched into the design.

The photo is of my very special crop friends. We have met monthly on a Saturday for about 5 years and each year have a 'birthday crop' in February to celebrate. At these crops we have had challenges, lots of cake and sometimes taken some group photos - this one is from our 3rd birthday crop.

I'd had the photo and the Basic Grey Doily matched up for a while, but everything I'd thought of was too dark, so to use a clear background helped to lighten it up. I punched holes down one edge with my Cropadile and used alternate pink and white eyelets in the holes to make a border.

I edged the acrylic with white paint, cut my patterned paper and then added some embellishments - labels from MME Rosey, a flower made from a hybrid printable from Shimelle, a chipboard flower and a BG brad. The thickers I had for the title were way too bright so I toned them down with two colours of versamark ink (thanks Lorna). The border strip is from Sassafras.

It all looks very simple but it took me ages to decide exactly how to do it, and I'm pleased with the result. Now the great memories from that crop (and all the others that have become a really important fixture in my life) are recorded in a way that makes me happy.

Materials used:

12x12 acrylic sheet, cropadile and WRMK eyelets, BG Olivia doily, MM noteworthy ledger paper, Border sticker from Sassafras 'Sunshine Broadcast', hybrid printable circles from Shimelle.com, chipboard flower (from stash), Brad from Basic Grey. White acrylic paint. Label stickers - MME Rosey, foam thickers from American Crafts, inks by Versamark.

Thank you for looking.

Monday, August 15, 2011

Counterfeit Sketch Swap Challenge


Well, I was all fired up after seeing the counterfeit challenge on the CKC Blog last night - a sketch swap. This is a new idea to me, but I needed to make a card so I picked my sketch from Sketch Support (above), and happily got to work.

I am really pleased with my card, and having felt smug all night for having achieved the sketch, it's taken until now for me to remember that I didn't actually use my kit AT ALL! Doh! I grabbed my scraps book and got to work. So this is my card, but it doesn't really count because it's not from the kit.

Back to the drawing board.... :)

Four LOs at one - I don't think so !


On my meanderings through Shimelle's Explore Class, she suggested a technique whereby you construct 4 LOs at a time, to 'basic finished' standard using a kit, then individually embellished them.

Buoyed up with my new Counterfeit Kit, I though this would be a great idea. However, I failed!! It worked up to a point, in that I managed to get 3 planned out, but I couldn't find a way to create a fourth - mojo went on strike, and I got far too interested in all the embellishments I wanted to add to one in particular! So the result is: Two finished completely, one almost 'basically finished' except it lacks a title and journalling, and one completely bare!!

It was an interesting technique though and with more room (I was trying to do it at our crop) I will try it again sometime, just to see!

I did use up quite a lot of the kit one way or another, and have completed 3 Los (two above plus another one not pictured, and have one on the go - so that's a good start.


Although I was sadly too busy to really participate, I also cast an eye at Shimelle's Cybercrop this weekend and worked with two of her challenges.

The first one provided some hybrid labels which I printed out and used, with inspiration gained from this beautiful LO from Kim Strother - thanks for the inspiration Kim :) - make the pink LO second from the top above. I then used her Starting Point Challenge sketch to create the 'birdie' LO above. I'm still dithering about whether it needs a title or not.

Thursday, August 11, 2011

Playing Along


I've been playing around with this picture, trying to work out how to scrap it, and decided to play along with Twisted Sketches for this week #114. Such a lovely simple sketch with a twist of 'Tiny' which fits my picture of dear daughter as a baby, looking like thunder. Despite the unflattering nature of the photo, I knew I had to scrap it as it tells the story of how her face always gives her feelings away, even 14 years later.

I dug out an old set of stamps and embossed them using two toned embossing powder, then realised I hardly have any scraps in that colour so scoured my scraps to find something that matched - lots of forward planning - not! I left it lying around for a while to see what I wanted to add to it, and decided that a journalling block, a punched edge, a heart embellishment and some tiny gems were all it needed - job done! I don't expect her to like it but I hope she will see why it is in her album. Bless!

Materials: off-white cardstock, Scenic Route pp, papermania gems, threading water punch, embossing powder and blue stamp pad, alphabet stamps and Basic Grey birdy stamp.

Sunday, August 07, 2011

Flowers for my kit


I really enjoyed having a little play this evening with some bits from my CKCB kit to make new embellishments. I only managed 4, but got to use my new Glubers which are giant sticky dots which make it easier to keep your spiral under control than sewing.

With so many flowers in the original kit and all the lovely tutorials on the CKCB blog, I feel duty bound to make as many as possible, if only because I don't actually have any pink flowers, only a few dusty icecream coloured primas, so if I'm going to use flowers on this kit's LOs I'm going to have to make them up myself - which is the point really - to use up stash making beautiful things.

Above are my efforts...

A couple of cards


I've had a manic weekend, working yesterday, out for dinner Friday and Saturday with friends and a birthday barbeque today - all good fun, but I'm trying really hard to keep up with my card needs rather than buying them, and created a couple yesterday, one for DS1's mate (who had the bbq) who is 16 this week, and one for my sister (who is more than 16 in a couple of weeks!).

It was fun having a play with scraps making flowers, and the Acceptable 80s digi download I bought from Little Musings came in useful again.

Saturday, August 06, 2011

August Counterfeit Kit


It's pink!! not a colour I use a lot in scrapping (although the previous post belies this - serendipity, or fortunate getting in the zone for some girly LOs this month.

The inspiration from the Counterfeit Kit Blog Challenge is a 2010 kit from My Creative Scrapbook, and is very girly indeed. I used the colour inspiration - including some black accents, and included a bit more cardstock as I ran out last month. Maybe a bit light on the embellishments, but I hope to make some this month, and heavy on alphabets as I wanted lots of choice.

With a crop coming up next Saturday, I have a week to sort out the perfect photos to complement my kit, and a bit of time in between to fashion some embellishments fit for a princess.

The photo shows it strewn across my desk - for photographic purposes only, I hasten to add - off to bag it up now :)

Friday, August 05, 2011

Something pretty...


I had time last night to go to my local crop and play - much appreciated time with friends and I managed a LO as well - using my 10 Days of Summer kit and the wonderful supply of punches on offer I had a really good dither before settling on a kraft background for my bright photo.

Shimelle would be ashamed of me choosing my papers according to the photo and not its mood (Explore module), but I'm not very good at this yet and the papers were dying to be used!

I did enjoy playing around with making embellishments from the range of things I had with me - i.e. not much, but the kit was so well put together that I could match things up perfectly. Abominable photo - I really must stop using DH's camera to photograph my LOs - I just can't seem to get them straight!

Coincidentally, the Counterfeit Blog kit inspiration for August is pink - so I'm on trend and will have to scour my collection to find the girly bits and do something outside my usual box. I'm sure photos won't be a problem as I have a daughter and 4 nieces for starters, and pink is always great with b&w photos. Hopefully this weekend will bring some time to get my kit collated.

Wednesday, August 03, 2011

Yay! I'm a Twisted Sister


I'm so happy to be joining one of the bi-weekly DT teams for Twisted Sketches. I've been a fan and a user of these sketches for a while now and am thrilled that they like my work.

This is my entry for the sketch, #114 with a 'vintage' twist, that I used as a main theme for my LO, using a family heritage photo, muted pp and lots of lovely embellishments, some of which came from my Gottacraft monthly kit - so yum - Cosmo Cricket.

Embellishment clusters are something I have been playing with for a while, having admired many of my crop friends doing it so beautifully. I'm still learning, but am having a huge amount of fun trying. I'm a bit more relaxed about mix and matching, not to mention piling them on when the mood takes me.

Materials used:
Background pp - donated by Sandra B (no idea of the brand), Other pp - Cosmo Cricket, Stickers - Crate Paper, October Afternoon, Making Memories (letters); Ribbon - Maya Road; Lace - Broadway Bargains; Pebble - Prima; Punches - Martha Stewart butterfly, 1" circle ; Clip - 7 Gypsies; Chipboard flower - stamped with Technique Tuesday flower stamps; Brads - foo-fa-la; Chipboard - Crate Paper; Pearl headed pin, gems, ribbon from stash.

Tuesday, August 02, 2011

Catching Up with Explore


Well, having missed a week and being manically busy, I have skipped last week and will catch up when I can - probably not the best idea, but I fancied playing with colour with the little bit of time I have right now - work commitments looming!

Well, the colourscope was fun - my favourite colours on there are pool, sage, peacock and cement, and all of them pretty much sum me up - well apart from the flirting!!

My favourite colour is turquoise, but there isn't that much of it in nature, at least not in my surroundings. I did have a necklace on yesterday and much of my wardrobe is turquoise as well. I told DH to stop me buying anything else in that colour. I also have green, red, navy and brown, but I only wear pink in bed, except for a shirt my sister bought me! Not sure of that logic.

I also love green, especially that kind of mid, slightly yellowy green that has been in decor mags lately and am planning to paint my dining room in that shade at some point.

My favourite wedding planner combo was Aqua, Leaf and Gold, but I was struggling to find much I liked at all - fussy? yes, 'fraid so.

None of the photo stuff done yet - I'll get to that - hopefully soon.

Back to Scrapping - a new LO


After about 10 days off, and a week away, I am now desperate to be scrapping, but have a shed load of work to do. I gave myself permission for a lunch break and took advantage of my summer treat, papers from Little Yellow Bicycle, which work perfectly with these ancient photos of DS1 (now 16!) and pre-digital which have been on my to do list forever.

Inspired by Sketch #112 at Twisted Sketches, it is a simple LO, using Bazzill Bling CS, and LYB journalling blocks, tickets, bling and pp, a red and blue pen, and a turquoise inkpad as extras. It might be half of a double LO in time, but let's not get too carried away! Awful wonky photo, I realised when I came to crop it - must try harder!